
问题 什么是大页(Large Page)?什么是透明大页(Transparent Huge Page)?它对我有什么帮助?
理论 虚拟内存现在已被视为理所当然。现在只有少数人还记得,更不用说做一些“真实模式”编程了,在这种情况下,你会接触到实际的物理内存。相反,每个进程都有自己的虚拟内存空间,该空间被映射到实际内存上。例如,两个进程在相同的虚拟地址 0x42424242 上拥有不同的数据,而这些数据将由不同的物理内存支持。现在,当程序访问该地址时,应将虚拟地址转换为物理地址。
Figure 1. 虚拟内存地址与物理内存地址之间的关系 这通常由操作系统维护 “页表”,硬件通过“页表遍历”来实现地址转换。如果在页面粒度上维护翻译,整个过程就会变得简单。但这样做的成本并不低,而且每次内存访问都需要这样做!因此,还需要对最新的翻译进行小型缓存,即 转译后备缓冲区(Translation Lookaside Buffer (TLB))。TLB 通常很小,只有不到 100 个条目,因为它的速度至少要与 L1 缓存相当,甚至更快。对于许多工作负载来说,TLB 未命中和相关的页表遍历需要大量时间。
既然我们无法将 TLB 做得更大,那么我们可以做其他事情:制作更大的页面!大多数硬件有 4K 基本页和 2M/4M/1G “大页”。用更大的页来覆盖相同的区域,还能使页表本身更小,从而降低页表遍历的成本。
在 Linux 世界中,至少有两种不同的方法可以在应用程序中实现这一点:
hugetlbfs。切出系统内存的一部分,将其作为虚拟文件系统公开,让应用程序通过 mmap(2) 从其中获取。这是一个特殊的接口,需要操作系统配置和应用程序更改才能使用。这也是一种“要么全有,要么全无”的交易:分配给 hugetlbfs(持久部分)的空间不能被普通进程使用。
透明大页(Transparent Huge Pages (THP))。让应用程序像往常一样分配内存,但尽量以透明方式为应用程序提供大容量页面支持的存储空间。理想情况下,不需要更改应用程序,但我们会看到应用程序如何从了解 THP 的可用性中获益。但在实际应用中,会产生内存开销(因为会为小文件分配整个大页面)或时间开销(因为 THP 有时需要对内存进行碎片整理以分配页面)。好在有一个中间方案:通过 madvise(2) 可以让应用程序告诉 Linux 在哪里使用 THP。
不明白为什么术语中会交替使用 "large "和 "huge"。总之,OpenJDK 支持这两种模式:
$ java -XX:+PrintFlagsFinal 2>&1 | grep Huge bool UseHugeTLBFS = false {product} {default} bool UseTransparentHugePages = false {product} {default} $ java -XX:+PrintFlagsFinal 2>&1 | grep LargePage bool UseLargePages = false {pd product} {default} -XX:+UseHugeTLBFS 将 Java 堆映射到 hugetlbfs 中,后者应单独准备。
“JVM 剖析花园”是由 JVM 研发专家及性能极客 Aleksey Shipilëv 撰写的一个系列文章,专门介绍一些有关 JVM 的基本知识。笔者也是前几年无意间发现的一片宝藏文章。早就有翻译过来,介绍给大家的想法,可惜一直未能付诸实践。最近在查资料时,无意间又翻到了这个系列,遂下定决心,完成这个萌发已久的小想法。
为了便于理解,对该系列的名字做了微调,原文是“JVM Anatomy Quarks”,将原文的“Quarks”(夸克)翻译为了“花园”。
“JVM 解剖花园”是一个正在进行中的小型系列文章,每篇文章都会介绍一些有关 JVM 的基本知识。这个名字强调了一个事实,即单篇文章不能孤立地看待,这里描述的大部分内容都会很容易地相互影响。
阅读这篇文章大约需要 5-10 分钟。因此,它只针对单一主题、单一测试、单一基准和单一观察进行深入探讨。这里的证据和讨论可能是轶事,并没有对错误、一致性、写作风格、语法和语义错误、重复或一致性进行实际审查。请自行承担使用和/或信任的风险。
以上是该系列介绍。这里介绍一次,后续文章不再赘述。 问题 众所周知,Hotspot 可以进行 锁粗化优化,有效合并多个相邻的锁定块,从而减少锁定开销。它能有效地对如下代码做优化:
synchronized (obj) { // statements 1 } synchronized (obj) { // statements 2 } 优化后:
synchronized (obj) { // statements 1 // statements 2 } 现在,今天提出的一个有趣问题是:Hotspot 是否会对循环进行这种优化?例如:
for (...) { synchronized (obj) { // something } } 是否会被优化成如下这样:
synchronized (this) { for (...) { // something } } 理论上,没有什么能阻止我们这样做。我们甚至可以把这种优化看作是 循环判断外提,只不过这里是针对锁而已。然而,这样做的缺点是有可能使锁变得过于粗糙,从而导致特定线程在执行大循环时占用锁。
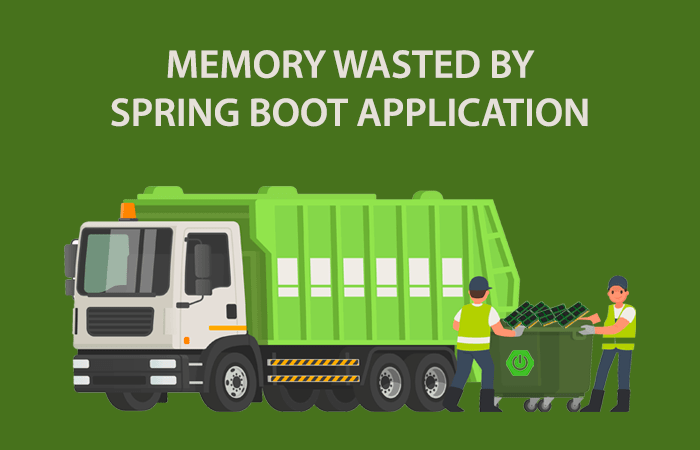
当今世界被广泛浪费的资源之一是:内存。由于编程效率低下,内存浪费量惊人(有时 "令人震惊")。我们在多个企业应用程序中都看到了这种情况。为了证明这一点,我们进行了一项小型研究。我们分析了著名的 Spring Boot Pet Clinic 应用程序,看看它浪费了多少内存。该应用程序由社区设计,旨在展示如何使用 Spring 应用程序框架构建简单但功能强大的面向数据库的应用程序。
环境 Spring Boot 2.1.4.RELEASE
Java SDK 1.8
Tomcat 8.5.20
MySQL 5.7.26 with MySQL Connector/J 8.0.15
压力测试 我们使用流行的开源压力测试工具 Apache JMeter 进行压力测试。我们使用以下设置执行了 30 分钟的压力测试:
线程数(用户)- 1000(连接到目标的用户数量)
上升周期(秒) - 10。所有请求开始的时间范围。根据我们的配置,每 0.01 秒将启动 1 个新线程,即 100 个线程/秒。
循环次数 - 永久。这 1000 个线程将背靠背执行测试迭代。
持续时间(秒) - 1800。启动后,1000 个线程持续运行 1800 秒。
Figure 1. JMeter 设置 我们在负载测试中使用了以下场景:
在系统中添加新的宠物主人。
查看宠物主人的相关信息。
向系统中添加一只新宠物。
查看宠物相关信息。
在宠物探视历史中添加探视信息。
更新宠物相关信息。
更新宠物主人的相关信息。
通过搜索主人姓名查看主人信息。
查看所有主人的信息。
如何测量内存浪费? 业界有数百种工具可以显示内存使用量。但是,我们很少遇到能测量因低效编程而浪费的内存量的工具。 HeapHero 是一款简单的工具,它可以分析堆转储,并告诉我们由于编程效率低下而浪费了多少内存。

当对垃圾回收性能做调优时,不仅能改善垃圾回收暂停时间,还能改善整个应用程序的响应时间并降低云计算成本。最近,我们帮助调整了一个流行应用程序的垃圾回收行为。仅仅是一个微小的改动,就带来了巨大的改善。让我们在这篇文章中讨论一下这个垃圾回收调整的成功案例。
垃圾收集关键绩效指标 有句名言叫“无法衡量的东西就无法优化”。说到垃圾回收的调整,您只需关注 3 个主要关键绩效指标 (KPI):
GC 暂停时间
GC 吞吐量
CPU 消耗量
垃圾回收运行时,会暂停应用程序。“GC 停顿时间”表示应用程序在垃圾回收事件中停顿的时间。该指标以秒或毫秒为单位。
“GC 吞吐量”表示应用程序处理客户事务的总时间与处理垃圾回收活动的总时间之比。该指标以百分比为单位。例如,如果有人说他的应用程序的 GC 吞吐量是 98%,这表明该应用程序有 98% 的时间用于处理客户活动,其余 2% 的时间用于处理垃圾回收活动。
即使是处理一个简单的请求,现代应用程序也会创建成千上万个对象。因此,垃圾收集器必须在后台不断运行,以释放为每个请求创建的成千上万个对象。因此,垃圾回收往往会消耗大量的 CPU。因此,在调整垃圾回收性能时,还应研究 CPU 消耗。要了解有关这些 KPI 的更多信息,请参阅: 内存调整: 关键性能指标。
如何获取这些 KPI? 在调优垃圾回收性能时,垃圾回收日志是您最好的朋友。您可以通过 这篇文章 给出的 JVM 参数在应用程序中启用垃圾回收日志。建议始终开启垃圾回收日志,因为它能提供丰富的信息,有助于预测中断、排除生产问题并帮助进行容量规划。此外,启用垃圾收集不会给应用程序增加任何明显的开销。
启用垃圾收集日志后,您可以使用免费的垃圾收集日志分析工具,如 GCeasy、 IBM GC & Memory visualizer 和 Google Garbage cat 等,查看上述关键绩效指标。
在下面这篇文章,教你 如何进行 GC 日志分析。
垃圾回收行为基线 介绍到此为止。让我们回到本文最初的主题。我们在这个流行的应用程序上启用了垃圾回收日志。我们让应用程序运行了 24 小时。然后,我们将生成的 GC 日志文件上传到 GCeasy 工具。该工具提供了具有洞察力的图表和 GC KPI。该应用程序的 GC 吞吐量为 96.176%,平均暂停时间为 12.429 秒。

应该在内存容量大的少量实例(即机器)上运行应用程序,还是在内存容量小的大量实例上运行应用程序?哪种策略是最佳的?这个问题可能会经常遇到。在开发应用程序长达 20 年,且构建了 JVM 性能工程/故障排除工具( GCeasy、 FastThread,、 HeapHero)之后,我仍然不知道这个问题的正确答案。同时,我相信这个问题也没有非黑即白的答案。在本文中,我想与大家分享一下我对这个问题的看法和经验。
两个数十亿美元企业的故事 由于我们的 JVM 性能工程/故障排除工具已广泛应用于各大企业,因此我有机会看到世界级企业应用的实际实施情况。最近,我有机会参观了两家高速成长的科技公司(如果我说出他们的名字,读这篇文章的人都会知道)。这两家公司的总部都在硅谷。它们的业务是技术,因此在工程设计方面很有一套。它们是华尔街的宠儿,享有极高的估值。它们的市值高达数十亿美元。它们是现代企业蓬勃发展的典型代表。在我们的对话中,让我们称这两家企业为公司 A 和公司 B。
在内存大小方面,两家企业都采用了两个极端,这让我感到非常惊讶。公司 A 将堆大小(即 -Xmx)设置为 250GB,而公司 B 则将堆大小设置为 2GB:公司 A 的堆大小是公司 B 的 125 倍。两家公司都对自己的内存大小设置很自信。俗话说:"事实胜于雄辩",两家企业都在扩大规模,处理数十亿的关键业务交易。
两家公司都从事相同的业务,收入/市值大致相同,位于同一地理区域,在同一时间点采用两种极端的内存大小,这真是一次绝佳的体验。鉴于这种现实生活中的真实经验,正确的答案是什么?大内存还是小内存?我的结论是:如果你有一支优秀的团队,采用这两种策略都能取得成功。
大内存容量可能很昂贵 与内存容量小、实例数量多的情况相比,内存容量大、实例(即机器)数量少的情况往往成本较高。以下是基于美国东部(弗吉尼亚州北部)地区 AWS EC2 实例成本的简单计算:
m4.16xlarge - 256GB 内存 - Linux 按实例收费:3.2 美元/小时
T3a small - 2GB 内存 - Linux 按实例收费:0.0188 美元/小时
因此,要获得 256GB 内存容量,我们必须获得 128 个 “T3a small” 实例(即 128 个实例 x 2GB = 256GB)。
128 x T3a small - 2GB 内存 - Linux 按实例收费:2.

三四十年前,开发人员负责释放在应用程序中创建的对象。业务应用程序相当复杂,有不同的工作流、用例和场景。即使开发人员在某个场景中少释放一个对象,对象也会在内存中累积,造成内存泄漏。Java 于 1995 年推出时,承诺自动进行垃圾回收。它将删除对象的责任从开发人员转移到了 Java 虚拟机(JVM),从而彻底改变了内存管理。整个行业都积极拥抱了这一创新理念,因为开发人员不再需要操心手动内存管理。从那时起,自动垃圾回收已成为所有现代编程语言的默认功能。
在本篇文章中,我们将探讨垃圾回收过程中的一个关键性能指标:"GC 吞吐量"。我们将了解它的含义、在 Java 应用程序中的重要性以及它对整体性能的影响。此外,我们还将深入探讨提高 GC 吞吐量的可行策略,为现代软件开发释放其优势。
什么是垃圾回收吞吐量? 每当运行自动垃圾回收事件时,应用程序都会停顿,以识别内存中未引用的对象并将其释放。在停顿期间,不会处理任何客户请求。垃圾回收吞吐量请求应用程序处理客户请求的时间占多大比例,垃圾回收活动的时间占多大比例。例如,如果有人说他的应用程序的 GC 吞吐量是 98%,这意味着他的应用程序有 98% 的时间用于处理客户请求,其余 2% 的时间用于处理垃圾回收活动。 高 GC 吞吐量是可取的,因为它表明应用程序有效地利用了系统资源,从而减少了停顿,提高了整体性能。相反,GC 吞吐量低会导致垃圾回收停顿时间增加,影响应用程序的响应速度,造成性能瓶颈。监控和优化 GC 吞吐量对于确保应用程序的顺利执行和响应速度至关重要。在下一节中,我们将探讨查找应用程序 GC 吞吐量的方法,并了解如何解释结果以优化 Java 应用程序性能。继续…
如何找到应用程序的 GC 吞吐量? 垃圾回收日志是研究 GC 性能的最佳来源。如果你的应用程序运行在 JVM 上,你可以通过 如何进行 GC 日志分析 文章中提到的 JVM 参数启用 GC 日志。启用 GC 日志后,让应用程序处理流量至少一天,以观察高流量和低流量时段各自的运行情况。之后,可以将生成的 GC 日志文件上传到 GC 日志分析工具,以获得有价值的分析结果。一些常用的 GC 日志分析工具包括 GCeasy、 IBM GC & Memory visualizer 和 Google Garbage cat 等。这些工具将报告 GC 吞吐量以及其他重要的 GC 指标。下面是 GCeasy 工具的摘录,展示了包括 GC 吞吐量在内的各种 GC 关键性能指标 (KPI) 报告。

ZGC 是一种专门的垃圾回收器,主要用于管理大型堆和尽量减少 Java 应用程序中的停顿。它能应对在内存密集型工作负载和一致的响应时间至关重要的情况下的垃圾回收的挑战。ZGC 利用并发处理能力和先进的算法,为优化现代 Java 应用程序的性能提供了有效的解决方案。在本篇文章中,将专门探讨调整 ZGC 以提高性能的技术。不过,如果想了解更多基础知识,可以观看在 JAX 伦敦会议上发表的 垃圾回收调优 讲座。
如何启用 ZGC? 确保使用的 Java 版本支持 ZGC。OpenJDK 从 JDK11 开始支持 ZGC。在启动应用程序时添加以下 JVM 参数,这样就可以在 Java 应用程序中启用 ZGC 垃圾收集器:
# D瓜哥 · https://www.digauge.com -XX:+UseZGC -XX:+ZGenerational (1) 1 D瓜哥注:分代 ZGC 从 OpenJDK 21+ 开始支持。 何时使用 ZGC? 如果应用符合其中任何一项要求,就可以考虑使用 ZGC:
堆大小较大:ZGC 特别适合堆容量较大的应用程序,堆容量通常在数十 GB 或更大。如果应用需要大量内存,ZGC 的低延迟特性将使其成为一个令人信服的选择。
低延迟要求:当应用需要一致的响应时间和低延迟性能时,ZGC 将大显身手。在需要最大限度缩短垃圾回收暂停时间的情况下,ZGC 表现出色,特别适合交互式应用和实时性应用。
具有不同工作负载的应用:ZGC 专为处理不同的工作负载而设计,因此适用于内存使用模式不可预测的应用。无论应用程序经历的是周期性的,突发性的,还是富有变化性的负载,ZGC 都能有效地适应这些调整。
ZGC 调优参数 ZGC 是 Java 中的一种垃圾收集器,它采用了一种不同的调优方法:将暴露的 JVM 参数数量降至最低。与需要细粒度调整的传统垃圾收集器不同,ZGC 专注于优化大型堆的管理,同时以最小的配置开销提供高效的垃圾收集。这种精简的方法允许开发人员主要关注一个关键的 JVM 调整参数:堆大小。

公司最近一年在推进降本增效,在用尽各种手段之后,发现应用太多,每个应用都做跨机房容灾部署,则最少需要 4 台机器(称为容器更合适)。那么,将相近应用做一个合并,减少维护项目,提高机器利用率就是一个可选方案。
经过前后三次不同的折腾,最后探索出来一个可行方案。记录一下,分享出来,希望对有相关需求的研发童鞋有所帮助。下面按照四种可能的方案,分别做介绍。另外,为了方便做演示,专门整了两个演示项目:
diguage/merge-demo-boot — 合并项目,下面简称为 boot。
diguage/merge-demo-web — 被合并项目,下面简称为 web。
Jar 包引用 这个方式,可能是给人印象最容易的方式。仔细思考一下,从维护性的角度来看,这个方式反而是最麻烦的方式,理由如下:
web 项目每次更新,都需要重新打包发布新版; boot 项目也需要跟着更新发布。拉一次屎,脱两次裤子。属实麻烦。
还需要考虑 web 项目的加载问题,类似下面要描述的,是否共用容器:
共用容器 — 这是最容器想到的方式。但是这种方式,需要解决 Bean 冲突的问题。
不共用容器 — 这种方式需要处理 web 容器如何加载的问题。默认应该是无法识别。
基于这些考虑,这种方式直接被抛弃了。
仓库合并,公用一套容器 这是第一次尝试使用的方案。也是遇到问题最多的方案。
将两个仓库做合并。
将 web 仓库的地址配置到 boot 项目里: git remote add web git@github.com:diguage/merge-demo-web.git;
在 boot 项目里,切出来一个分支: git switch -c web;
将 web 分支的提交清空: git update-ref -d HEAD,然后做一次提交;
将 web 项目的代码克隆到 web 分支上: git pull --rebase --allow-unrelated-histories web master;注意,这里需要加 --allow-unrelated-histories 参数,以允许不相干的仓库进行合并。

最近公司可以申请零净值 MacBook 笔记本,就随手申请了一个。由于有很多软件需要安装,就搜集了一下以前安装软件的命令,整理成一个安装脚本,分享出来,方便后续再次装机。
1. xcode-select 作为开发人员,这是基础工具包,必须安装:
xcode-select --install 2. 安装脚本 安装脚本主要构成如下:
2.1. oh my zsh 安装脚本先安装了 oh-my-zsh。最近帮同事搞 MacBook,没有 oh-my-zsh 的加持,写命令行浑身难受。
Figure 1. oh-my-zsh 由于安装 oh my zsh 会导致脚本退出,所以,单独安装:
#!/usr/bin/env bash # # Author: D瓜哥 · https://www.diguage.com # # 安装 oh-my-zsh sh -c "$(curl -fsSL https://cdn.jsdelivr.net/gh/ohmyzsh/ohmyzsh/tools/install.sh)" 2.2. Homebrew 脚本里面主要使用了 Homebrew 来安装软件。
Figure 2. Homebrew 2.3. sdkman Java JDK + Maven 等相关安装,主要使用了 Sdkman,方便多个版本相互切换。
Figure 3. sdkman 2.4. 感谢 jsDelivr 为了解决安装 oh-my-zsh 和 Homebrew 时,GitHub 访问不畅,使用 jsDelivr 将它们的安装链接进行改写,可以利用 CDN 加速,让安装过程更加顺利。

最近有小伙伴在开发时,遇到了一个 Spring 占位符,例如 ${token}, 在不同环境下处理不一致的问题,正好对 Spring 对占位符的处理也有一些不清楚的地方,趁此机会,把 Spring 对占位符的处理机制深入了解一下,方便后续排查问题。
经常阅读D瓜哥博客的朋友可能知道,D瓜哥在 Spring 扩展点实践:整合 Apache Dubbo(一): Spring 插件机制简介 中已经介绍了 Spring 的插件机制。在阅读以下内容之前,建议大家先去阅读一下这篇文章中“Spring 插件机制简介”章节的内容,以便于无缝衔接。
在分析的过程中发现, Spring 对占位符有两种截然不同的出来阶段:① XML 配置文件中的占位符;② Java 源代码中 @Value 注解中的占位符。由于内容较多,一篇讲解完有些过长,所以分三篇文章来分别介绍这两种处理过程。
本篇首先来介绍一下对 XML 配置文件中的占位符的处理。
示例代码 在正式开始之前,先来看一下示例代码:
UserRpc.java /** * @author D瓜哥 · https://www.diguage.com * @since 2023-05-02 10:23:49 */ public class UserRpc { @Value("${user.appId}") private String appId; // 这里不使用注解,而是使用 XML 配置 // @Value("${user.token}") private String token; } token.properties user.appId=dummyAppId user.token=dummyToken spring.xml <?xml version="1.